Setting up SpecForge on macOS
This guide will walk you through setting up SpecForge on macOS.
1. Installation
PKG Installer (Recommended)
Download specforge-x.y.z-macOS-ARM64.pkg from the SpecForge releases page and open it to run the installer.
Note: The installer requires an Apple Silicon (arm64) Mac. Unlike the Windows MSI installer, it does not bundle any dependencies, so you still need to install Z3 as described in the next step.
MacOS Gatekeeper may prevent the downloaded installer package from opening, because it comes from a third-party source. If this happens, allow it as described in Allowing Execution of the Downloaded SpecForge Binary below, using the path to the .pkg file.
Standalone Executable
Download specforge-x.y.z-macOS-ARM64.tar.bz2 from the SpecForge releases page and extract it to a directory of your choice.
Allowing Execution of the Downloaded SpecForge Binary
If you used the PKG installer, try to open the downloaded .pkg file.
If you used the standalone executable, navigate to the directory where you extracted it and run:
./specforge --version
The MacOS Gatekeeper may display an alert preventing you from opening the downloaded file because it came from a third-party source. If the installer opens or the command runs successfully, proceed to the next step.
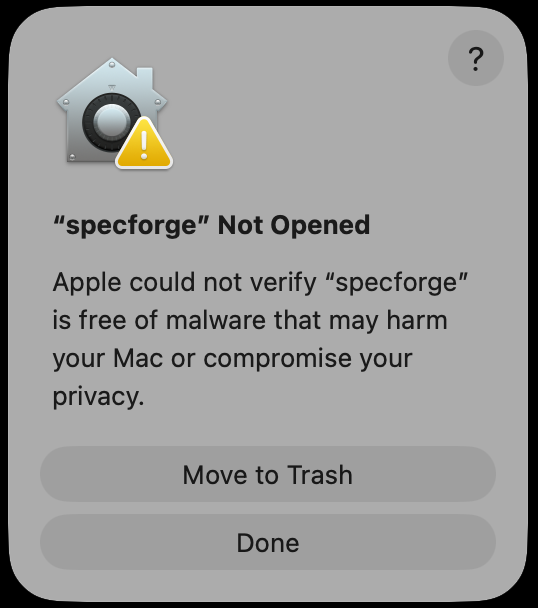
To remove the quarantine attribute, run the command for the file you downloaded:
# PKG installer
xattr -d com.apple.quarantine path/to/specforge.pkg

# Standalone executable
xattr -d com.apple.quarantine path/to/specforge
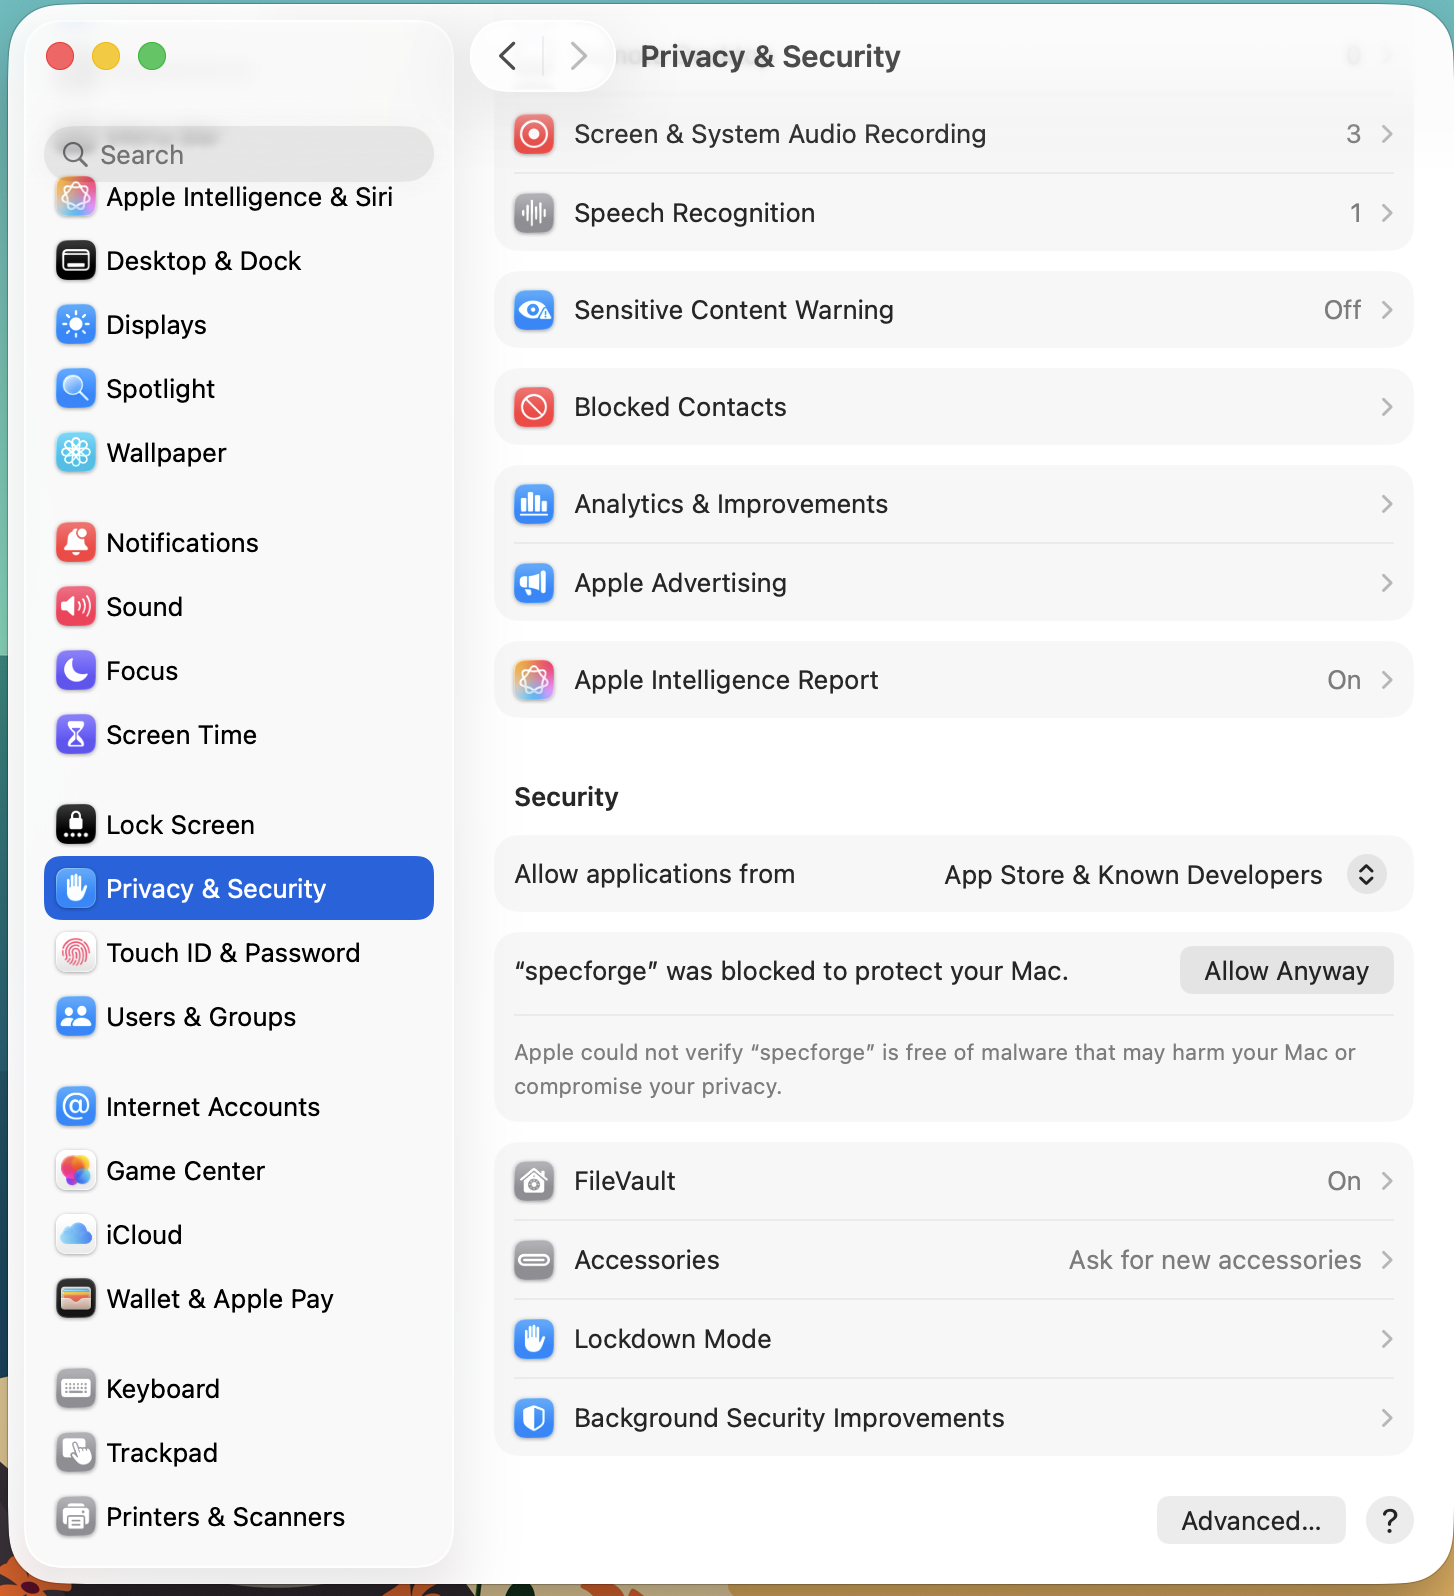
Alternatively, you can do so from the System Settings GUI by following these steps.
- Open System Settings, and go to ‘Privacy & Security’
- In the security section, you should see that SpecForge was blocked.
- Click ‘Open Anyway’.
2. Install Dependencies
The SpecForge executable requires Z3 to be installed. rsvg-converter is optional but recommended for SVG-to-PNG conversion used by the animation feature.
Install using Homebrew:
brew install z3 librsvg
If you don’t have Homebrew, install it from brew.sh.
Note:
librsvgprovides thersvg-convertcommand. Without it, theanimate()feature in the Python SDK will not be able to render PNG frames from SVG visualizations. All other SpecForge features work without it.
3. Configure Your Edition and License
SpecForge defaults to the Community Edition when no tier or license is configured. The commercial tier runs the Essential Edition with project-size limits unless a valid license enables the Enterprise Edition. See Editions, usage tiers, and licenses for details and instructions for changing tiers.
To run the Enterprise Edition, place your license.json file in one of the
following locations:
SpecForge also searches for *-license.json in the standard configuration and current directories before these license.json paths. If SPECFORGE_LICENSE_FILE is set, only that file is searched.
-
Standard Configuration Directory (recommended):
~/.config/specforge/license.json
-
Environment Variable (for custom locations):
export SPECFORGE_LICENSE_FILE=/path/to/license.json -
Current Directory:
./license.json
Create the directory if it doesn’t exist:
mkdir -p ~/.config/specforge
cp /path/to/your/license.json ~/.config/specforge/
4. Configure LLM Provider (Optional)
To use LLM-based features such as natural-language spec generation and error explanation, configure an LLM provider by setting environment variables before starting the server.
For OpenAI (recommended):
export SPECFORGE_LLM_PROVIDER=openai
export SPECFORGE_LLM_MODEL=gpt-5-nano-2025-08-07
export OPENAI_API_KEY=your-api-key-here
Get an API key from platform.openai.com/api-keys.
For other providers (Gemini, Anthropic, Ollama), see the LLM Provider Configuration guide.
5. Start the Server
If you used the PKG installer, run from any directory:
specforge serve
If you used the standalone executable, navigate to the directory where you extracted the SpecForge executable and run:
./specforge serve
The server will start on http://localhost:8080. You can verify it’s running by navigating to http://localhost:8080/health, which should show version information.
6. Install the VSCode Extension
Install the SpecForge VSCode extension from the Visual Studio Marketplace or see the VSCode Extension setup guide.
7. Install the Python SDK (Optional)
The Python SDK enables interaction with the SpecForge server programmatically from Python. This can be used to embed SpecForge analyses in Python notebooks and directly feed and retrieve data using Pandas Dataframes. See the Python SDK setup guide for instructions on how to set it up.
Further Reading
- VSCode Extension - Learn about the VSCode extension features
- Python SDK - Set up the Python SDK for programmatic access
- A Whirlwind Tour - Take a tour of SpecForge capabilities
- Project Configuration - Learn about
specforge.tomlconfiguration